Introduction
Jenkins is an automation server that is available for free to use. It uses a devops pipeline with many features and supports a large number of plugins to make more flexibility. We can configure many projects like PHP, JAVA, and Python. DOT Net to create automated continuous intigration and continuous delivery pipeline.
Prerequisites
- Up and running Ubuntu 24.04 machine
- Basic knowledge of linux command line
- Internet connectivity
In this artical blog, We will show you how to install and configure Jenkins on ubuntu 24.04 LTS linux machine.
Step 1: Update System Packages
Run the following command to update the package lists from the repositories, To update the default repository:
sudo apt-get updateAfter this updating the package lists, you can upgrade the installed packages, Use the given command for the same.
sudo apt-get upgrade -yStep 2: Installing Java Development Kit (JDK)
We have to install JAVA 17 version on Ubuntu 22.04 linux machine because Jenkins runs on Java. We need to use install OpenJDK package using the following command:
To add the JAVA 17 repository:
sudo add-apt-repository ppa:linuxuprising/javaTo update the repository:
sudo apt-get updateTo install the JAVA 17:
sudo apt install openjdk-17-jdk -yTo verify JAVA installed version:
java --versionStep 3: Add Jenkins Key and Repository
We have to add the Jenkins repository key and repo by using following command in order to add the key:
echo deb [signed-by=/usr/share/keyrings/jenkins-keyring.asc] \
  https://pkg.jenkins.io/debian-stable binary/ | sudo tee \
  /etc/apt/sources.list.d/jenkins.list > /dev/null
To add repository:
curl -fsSL https://pkg.jenkins.io/debian-stable/jenkins.io-2023.key | sudo tee \
  /usr/share/keyrings/jenkins-keyring.asc > /dev/null
Step 4: Installing Jenkins
Update System Packages Again and install the Jenkins by using given command.
sudo apt-get update && sudo apt-get install jenkins -yStep 5: Controlling Jenkins Service
We need to also control the Jenkins service to manage the Jenkins’s process, We can control the Jenkins process by using systemctl utility, To get jenkins service status.
sudo systemctl status jenkinsBy using the systemctl command with jenkins service, We can see that jenkins service is up and running and its also auto with os restart.
Step 6: Access Jenkins Web Interface
To access with Jenkins UI we need to use Jenkins Public, Private IP addrees and domian name also we need to add the port 8080 because Jenkins by default run on this port.
Open a web browser and visit http://localhost:8080. If you are accessing the server remotely, replace localhost with the server’s IP address or hostname.
Step 7: Unlock Jenkins
To unlock Jenkins, you’ll need to retrieve the initial administrator password. Run the following command to display the password:
sudo cat /var/lib/jenkins/secrets/initialAdminPasswordStep 8: Jenkins Plugin Installation
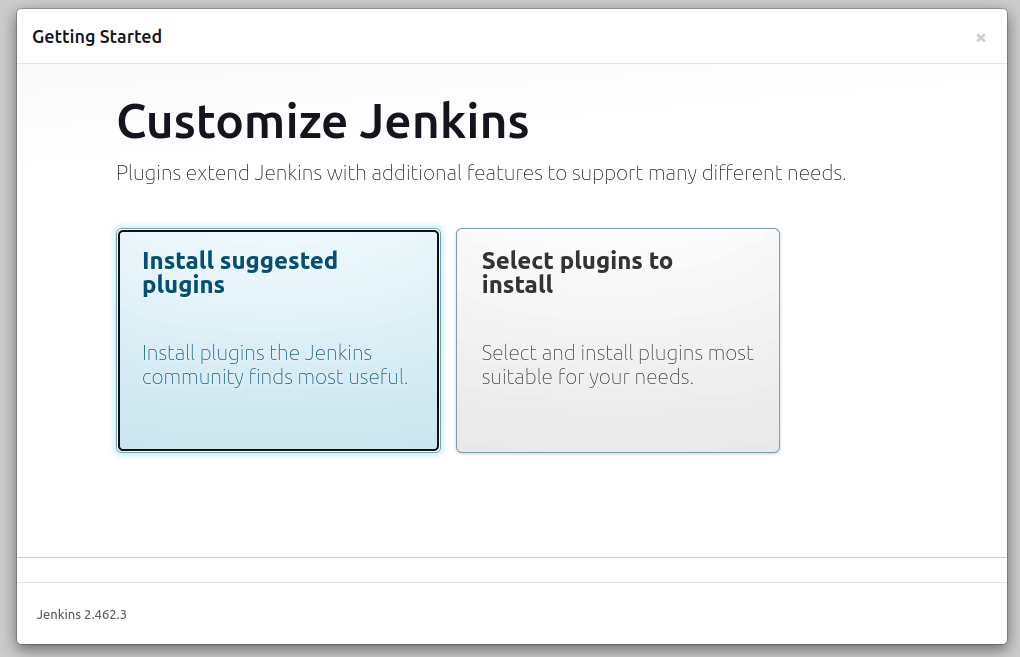
On this step we will get the plugins to install as per suggestion and manual selection, Install suggested plugins in recommended.
We will see that Jenkin’s plugin installation under process.
Step 9: Creating Admin User
We should get first admin user creating form where we can set our admin username, password, full name and email id, Put yours details.
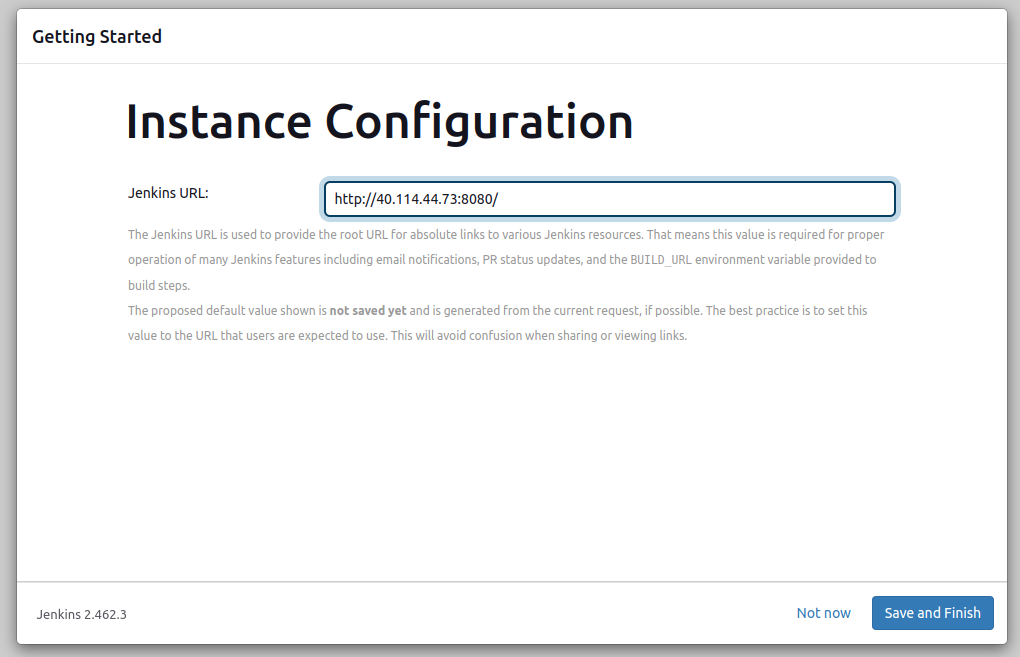
Step 10: Configure Endpoint
We need to verify the IP address and domain with port 8080 and then click on Save and finish.
After this we should get the Jenkins is ready page and click on Start using Jenkins button to get Jenkins dashboard.
If everything is configured fine, We should get Jenkins’s dashboard like this.
Conclusion
In this blog we done the installation process of Jenkins automation on a Ubuntu 24.04 LTS Linux machine. you are still facing issues, so please leave a message below and our support team will provide a solution as soon as possible.


